Trace Bitmap

This tool automatically traces or fits vectors to image files so they can be machined. Use the Import Bitmap tool and select the image in the 2D view, then open Fit Vectors to Bitmap.
After importing an image the Tracing option allows vector boundaries to be created automatically around colored or black and white regions in the image.
Tracing a Selected Area of the Bitmap
You can define an area within the bitmap, such that only that part of the bitmap will be traced. This can be done by selecting the bitmap (if this hasn't been done already), and then clicking and dragging the mouse over the area you want, to define a rectangular region on the bitmap. This will be highlighted with a dashed black rectangle.
Clicking on the Bitmap again will remove a selected area if one has been specified, in which case, the entire bitmap will have vectors fitted to it.
Tracing Black and White Images
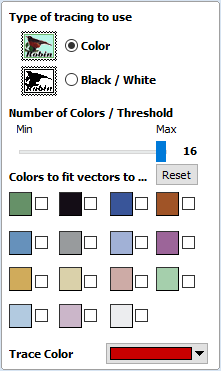
When working with Black and White images the slider can be used to change the Threshold and merge the levels of gray between all white (min), and all black (max).
When the image being displayed in the 2D view looks correct then clicking the button automatically creates vector boundaries either around the selected Trace Color or the grayscale.
Tracing Color Images

Color images are automatically reduced to 16 colors and the slider allows the visible number of colors to be set as required. Colors are merged with the closest match.
Colors can be temporarily linked together by clicking the check boxes next to each of the colors displayed. This changes the color displayed in the 2D view to the selected Trace Color. This is very useful for merging similar color's together to allow complete regions to be traced.
If a new Trace Color is selected the linked colors are displayed using this color in the 2D view.
The Reset button unlinks all the checked ✓ colors and the image displayed in the 2D view reverts back to the original 16 color image.
2D View
You can select the colours directly from the image in the 2D View.
Tracing a Selected Area of the Bitmap
You can define an area within the bitmap, such that only that part of the bitmap will be traced. This can be done by selecting the bitmap (if this hasn't been done already), and then clicking and dragging the mouse over the area you want, to define a rectangular region on the bitmap. This will be highlighted with a dashed black rectangle.
Clicking on the Bitmap again will remove a selected area if one has been specified, in which case, the entire bitmap will have vectors fitted to it.
Fitting-Options
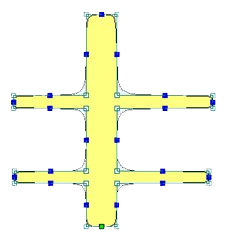
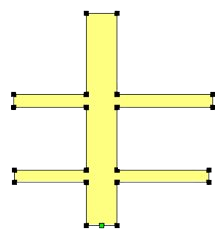
The options available on this form control how closely the vectors fit / follow the selected color boundaries and these can be modified to obtain improved results.
Corner Fit
The Corner Fit control determines how accurately the vectors are fitted to the corner edges in an image.


Noise Filter
The Noise Filter slider controls the minimum size of pixels that are traced / vectorized, preventing small unwanted vectors or noise being created.
Bitmap Fading
Preview
This will preview the result of the tracing of the bitmap. If you are not happy with the result provided, you can alter the settings and click on the button again to get an updated result.
Apply
When you are happy with the result of the preview you can click on the button to keep it.